恥ずかしながら英文で書いてみますねぇ。。。
おかしな文面、スペルミスは御容赦下さいまし。m(_ _)m
My new item arrived at 8th Feb. 2011.
I went to directly receive it at Post Office on 10th Feb. :-)

And after that, I went to Kamakura... Satoshi's Special Garage.
Satoshi's Blog : http://satoshigt3.blogspot.com/

Ambient Temp. was 12.0deg.C at 2PM. Not so cold.

So, new item is a "Cable Guard" for Hypermotard.
Materials are Aluminum & Dry Carbon.
Manufacturer is "Carbon World" Germany.
http://www.carbonworld.de/shop/

Two oil line carbon supports were attached.
But, this time, it was not used.

Back side

It's very good quarity... I think. (^_^)

Above and below pics are original oil line...Fittings were made by Steel.
Already, rusty...
Oil Cooler is made by "SC Project" Italy.
http://www.sc-project.com/
Heat exchange effciency is high... very nice at summer season...
Of course, at race situation, also.
But, too cool at winter season... (^_^;

Face of my Hyper... :-)

This XEROX Machine is Satoshi's. Model 2009

Very Cool !!! & Clean... Always... (-_-;

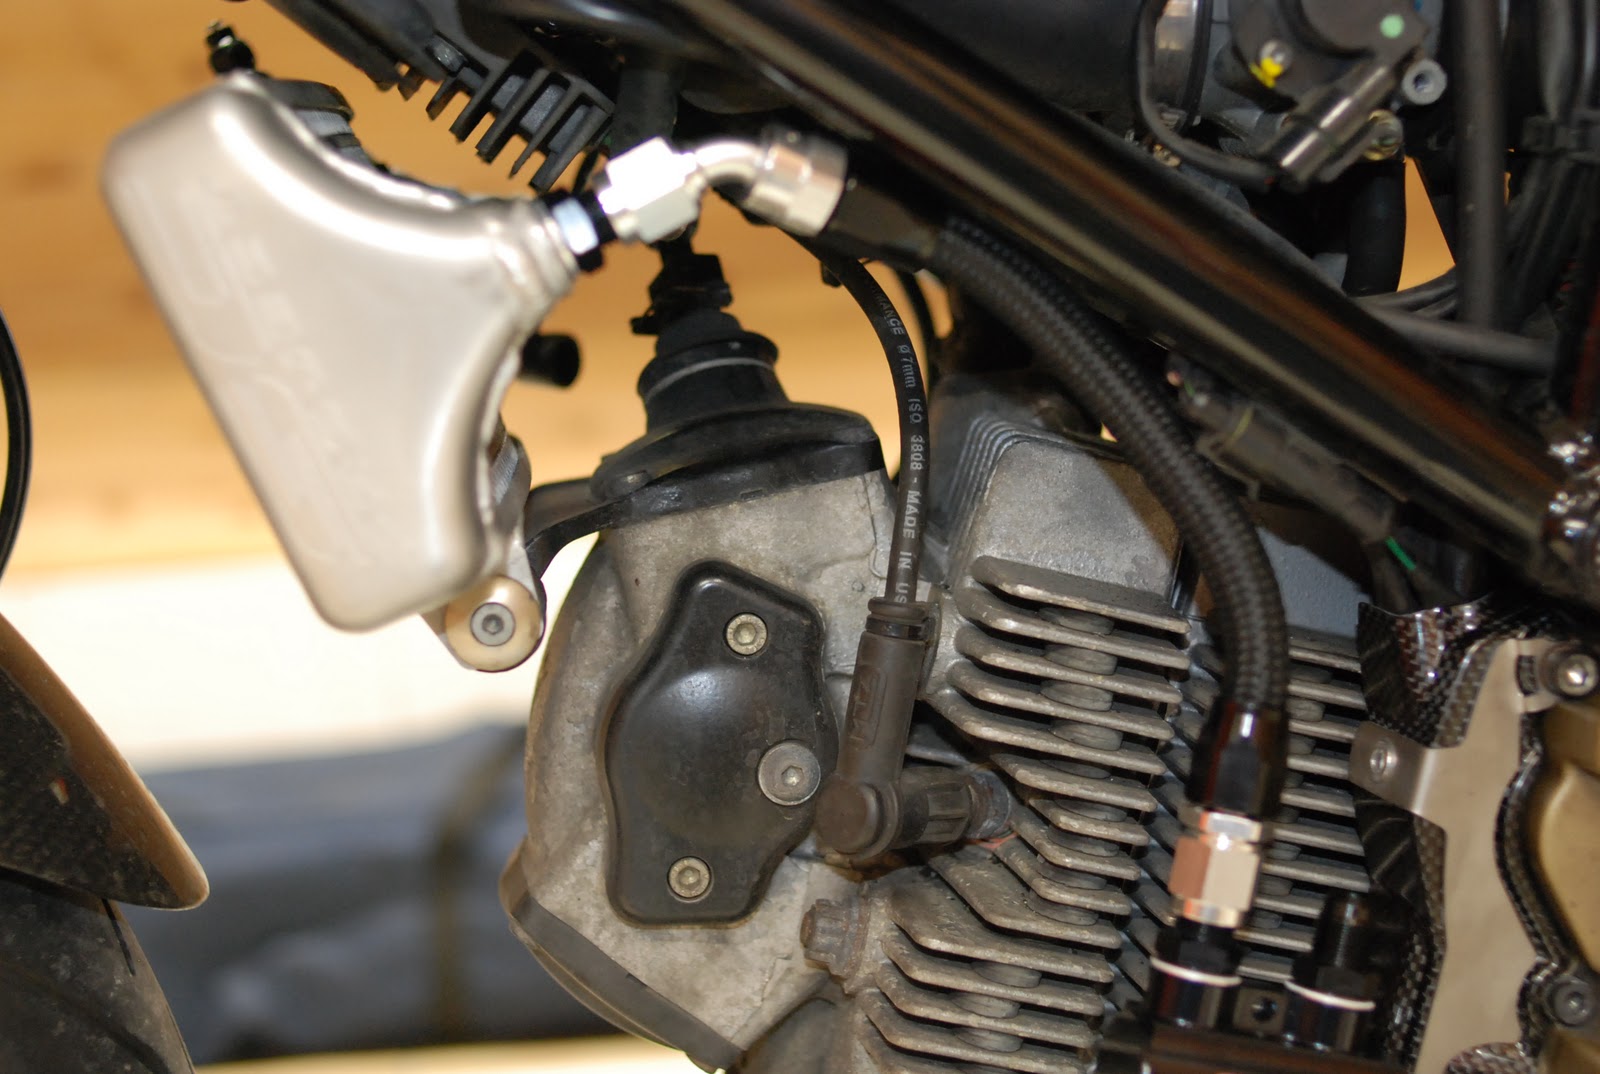
His Thermo-Valve was installed horizontally.
It's proto type of installation by him.
And Thermo-Valve Support was fixed on front cylinder.
So, there is a hole at lower the front bank cylinder.
But, there is no hole at 2007-2008 model...
My Hyper is model 2008.
Satoshi-san and I thought it's NG idea
that make a hole on the cylinder by ourselves.
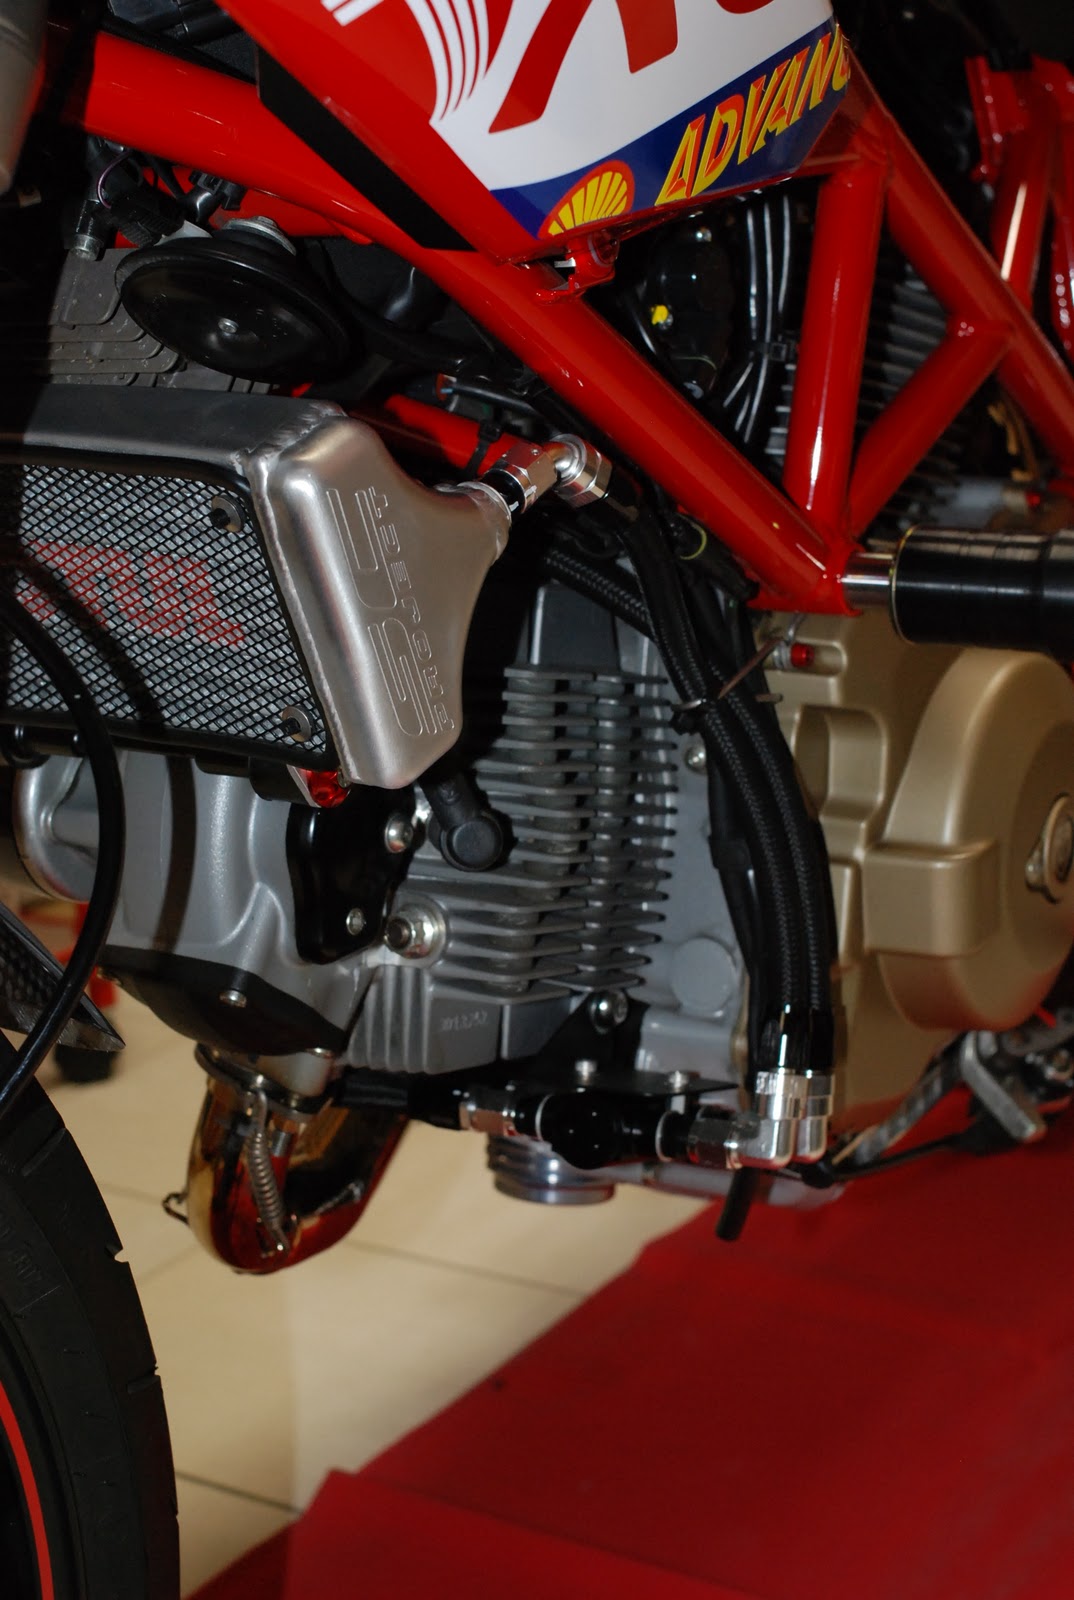

I knew this cable guard was installed at side of the front bank cylinder.
I thought I would be able to apply it to mount base of thermo-valve.
It was main reason that I purchased this cable guarde.

It was necessory that scrape a part of carbon part for installation.
Oil line supports have been removed.
Start of oil line replacement...
First, removed all of original oil lines

Location plan of Thermo-Valve...

So, reason of cable guarde installation was...
attach the support and fix the thermo-valve.

Only small support was needed for fixing of thermo-valve.
Satoshi-san made a support by Aluminum plate, soon.

Install Thermo-valve...temporarily.
It should be kept distance between cylinder and thermo-valve.
That distance is about 50mm(?) now.

Temporarily installation... Thermo-valve was upside-down... (^_^;
Just temporarily assembling!!

New oil line was connected at Oil Cooler.
This side is outlet of oil cooler.

Crank case part... IN/OUT of oil line
Black & Silver Fittings are very COOL!!! I like... (^_^)
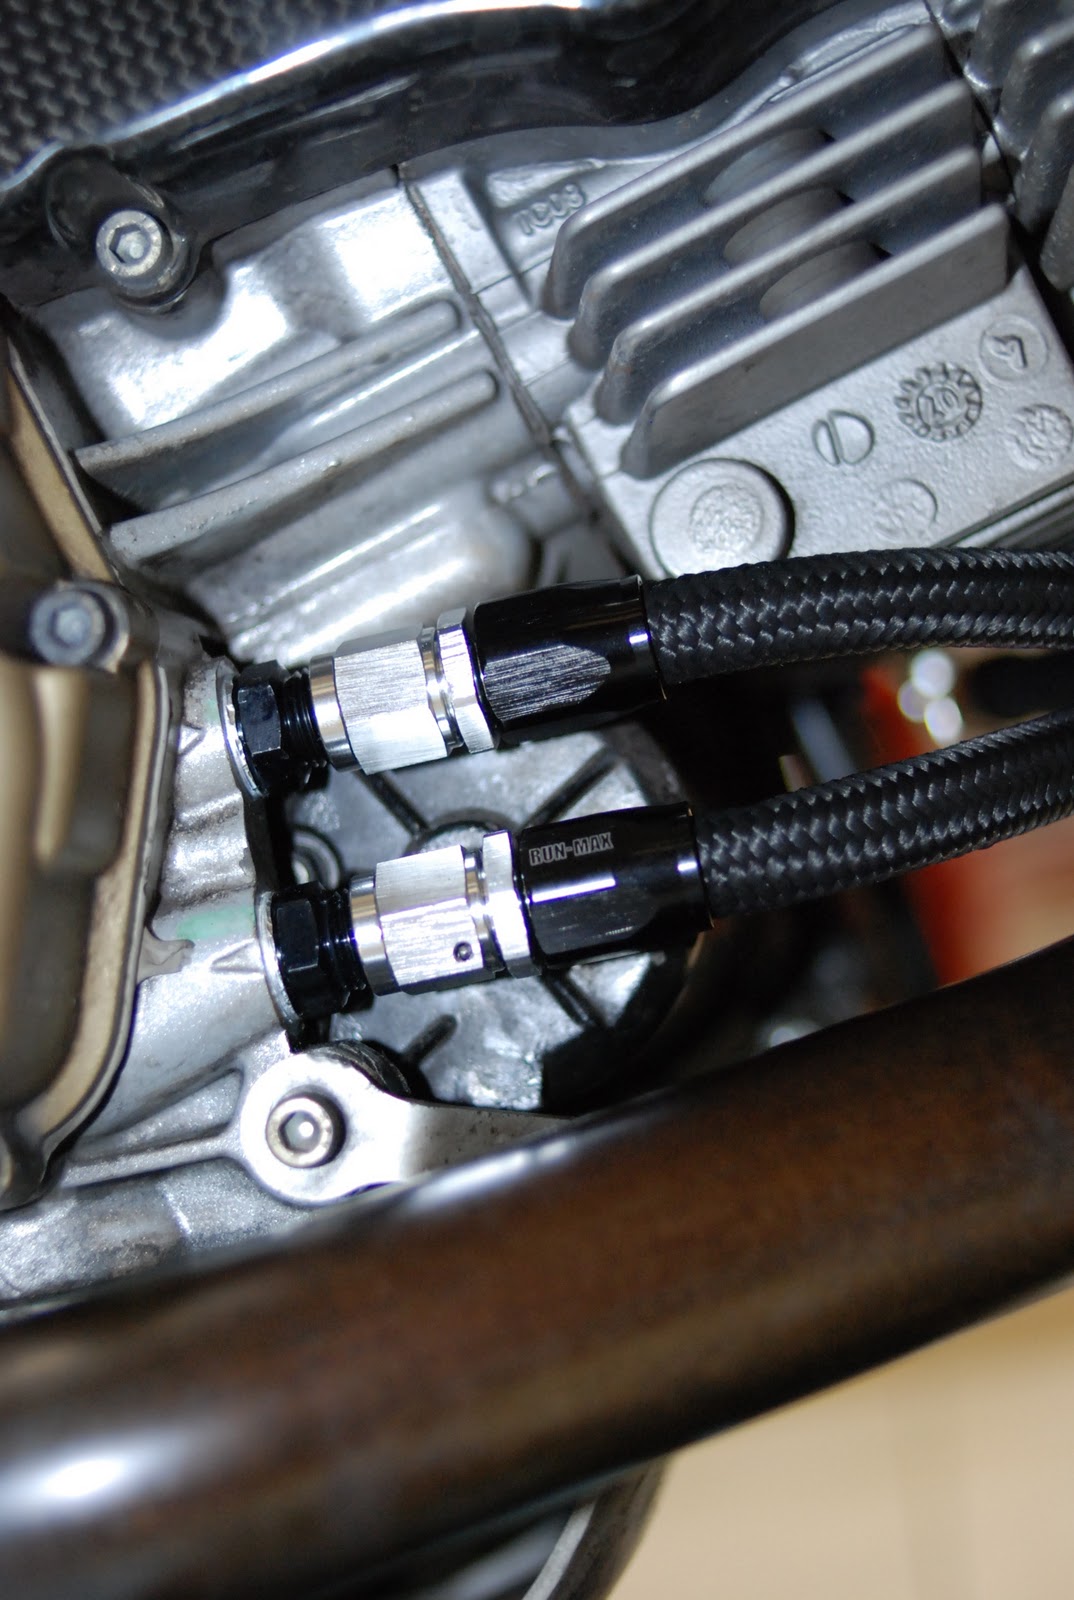
Fitting for Oil Cooler IN/OUT parts.
Angle is 45deg.
All of these fittings are made by "KINOKUNI" Japan.
http://www.kinokuni-e.com/

Thermo-Valve is made by "Active" Japan.
http://www.acv.co.jp/

Silver one is another product.
It's available that Temp. & Press. sensors are installed
on the thermo-valve body, directly.

New oil line was connected from thermo-valve to oil-cooler .

All of flexible tube should be fitted and cut for each part.
Because, there is a little difference of dimension at each machine.
All of oil lines were installed... Finished!!

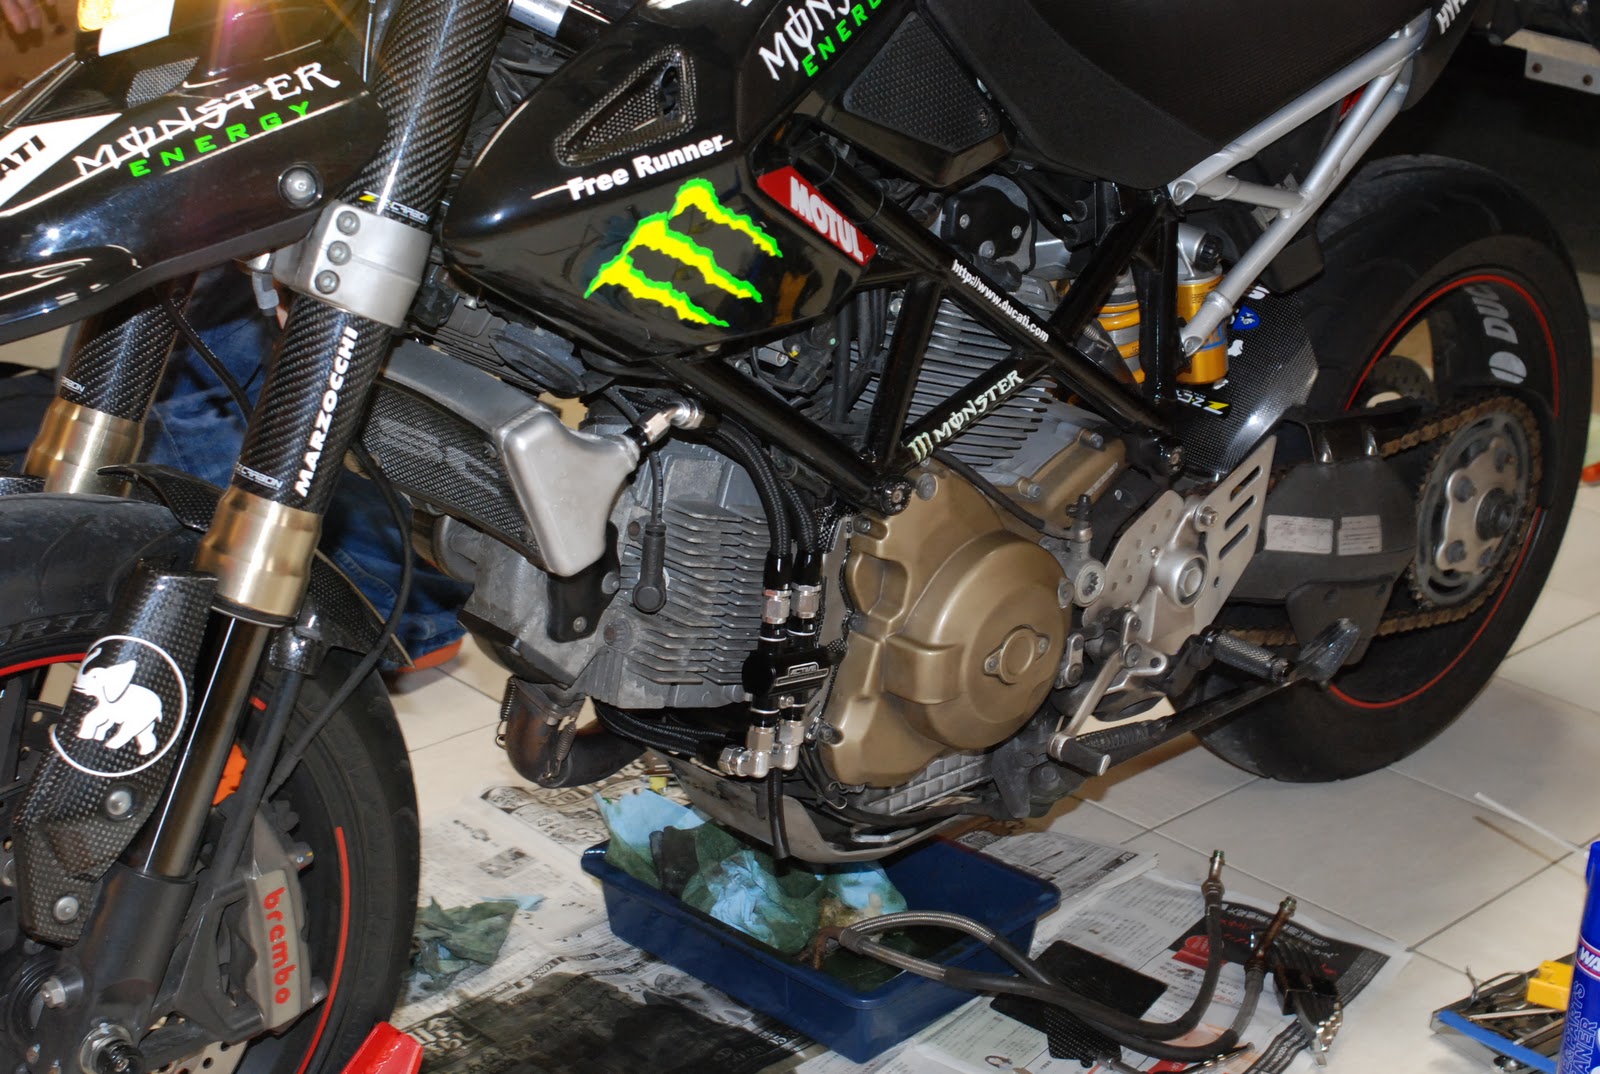
How about looks? (^_^)

TEST...
Original temp. sensor is installed on the oil cooler outlet.
Thus, it will not be able to meausure oil temp. when oil temp. is lower than 70deg.C.
Because, thermo-valve begin to open at about 70deg.C.
And then, full open at about 85deg.C...
Therefore, thermo-sensor should be re-located...
as DS Engine of Sport Classic series.


I want to go to TEST RUN, soon!! :-)
Pics by Nikon D80 + Nikkor 35mm/f2.0
Jun